A cyberdeck is a portable computer you build, or at least customize, to look and work exactly the way you want: a screen, a keyboard, a battery and a brain, packed into a rugged case, a 3D printed shell or something found at a flea market. The look gets the attention, but the hardware decides whether it works. This guide goes through every layer of a real build: which brain to pick (ESP32, Pi Zero 2 W, Pi 5 or a Compute Module), screens, power and battery life, modules on the GPIO header, the shell, heat, and three complete parts lists with 2026 prices.
The short answer
Decide the deck's job first, then pick the brain: an ESP32 for a pocket deck that does one thing (a radio, a synth, a tool) and runs for hours, a Pi Zero 2 W or a small-memory Pi 5 for a Linux terminal, and a Pi 5 with 4GB or more only for a smooth desktop, SDR work or NVMe storage. Add a 5 to 7 inch screen, a compact keyboard, a USB-C power bank or UPS board, modules on the GPIO header (LoRa, GPS, sensors), and a case with airflow and antennas on the outside.
- What is a cyberdeck?
- Cyberdeck build ideas: decide the job first
- How the parts fit together
- Choosing the brain: ESP32 vs Raspberry Pi
- Screens and keyboards
- Power and battery life
- I/O and modules on the GPIO header
- The shell: five ways to build the case
- Thermal basics
- Cyberdeck build list: three builds with prices
- Cyberdeck kits and decks for sale
- Software
- Cyberdeck build guide, step by step
What is a cyberdeck?
The word comes from William Gibson's 1984 novel Neuromancer, where hackers "jack in" to cyberspace through portable consoles called decks. Gibson described them only loosely: portable, personal, and usually modified by their owners. That vagueness is exactly why the idea stuck. Anyone can decide what their deck looks like.

The modern hobby took off around 2019, when maker Jay Doscher built his Raspberry Pi Recovery Kit: a rugged computer in a hard-shell case with a small display, a mechanical keyboard and a milled aluminum faceplate. Since then Hackaday has run dedicated cyberdeck contests, communities like r/cyberDeck have filled up with builds, and decks range from military-looking field kits to wooden retro terminals and pocket handhelds.
What makes something a cyberdeck rather than a small laptop is intent: it is built for a purpose, usually with hardware a laptop does not have (a radio, a sensor, physical switches), and it looks like it was made by its owner.
Cyberdeck build ideas: decide the job first
The most common mistake is starting with the case. Start with what the deck is for, because the job decides the brain, and the brain decides the power, the heat and the size of everything else. Here are six builds people actually make, and what each needs.
| Job | Brain | Screen | Extras |
|---|---|---|---|
| Field terminal (SSH, notes, code) | Pi Zero 2 W, or Pi 5 1GB or 2GB | 5" HDMI, or 5" to 7" DSI | Compact keyboard, small USB hub |
| Off-grid messenger | ESP32-S3 (or a Pi with a LoRa HAT) | Built in, or a small status OLED | SX1262 LoRa radio, GPS, antenna outside the case |
| SDR and radio station | Pi 5, 4GB or more | 7" or larger | SDR USB dongle, antennas, powered USB hub |
| Retro gaming | Pi 5 (or Pi 4) | 5" to 7" | Buttons or a controller, speaker, active cooling |
| Music and synth deck | ESP32-S3 | Small, built in | Speaker, headphone jack, a real keyboard |
| Pocket deck | Cardputer ADV (ESP32-S3) or CardputerZero (Linux) | Built in | Plug-in caps and modules |
A useful test from our ESP32 vs Raspberry Pi guide: if you can describe the deck in one sentence without the word "computer" ("a LoRa messenger", "a synth"), it is a microcontroller job. If the sentence is "a tiny Linux box", it is a Pi job.
How the parts fit together
Every cyberdeck, from a pocket handheld to a briefcase, is the same five blocks: power, a brain, a screen, input, and I/O. The diagram shows how they connect and which bus each part uses.
Choosing the brain: ESP32 vs Raspberry Pi
There are two families of brain, and they are very different things. An ESP32 is a microcontroller: it runs one program the instant it gets power, keeps precise timing, and sleeps on microamps. A Raspberry Pi is a Linux computer: it boots an operating system and runs a desktop, a browser, Python and SSH, and it draws watts, not microamps.
| ESP32-S3 | Pi Zero 2 W | Pi 5 | Compute Module 5 | |
|---|---|---|---|---|
| What it is | Microcontroller | Linux computer | Linux computer | Pi 5 class computer on a module |
| Processor | Dual-core, 240 MHz | Quad Cortex-A53, 1 GHz | Quad Cortex-A76, 2.4 GHz (BCM2712) | Same family as the Pi 5 |
| Memory | 512 KB SRAM, optional PSRAM | 512 MB | 1, 2, 4, 8 or 16 GB | Several options |
| Start-up | Instant | Boots Linux | Boots Linux | Boots Linux |
| Power | 7 µA deep sleep | About 350 mA active | About 2.6 to 3 W idle, 7 to 9 W under load | Depends on the carrier board |
| Price (list) | About $15 (official dev board) | $15, but sold out almost everywhere in 2026 | $45 (1GB) to $305 (16GB) | From $67.50 |
| Best deck | Pocket, radio, music, tools | Low-power terminal | Desktop, SDR, gaming, NVMe | Custom carrier board decks |
Pi 5 power figures are independent third-party measurements; prices are official list prices, checked October 2026.
When to use a Raspberry Pi 5
The Pi 5 is the first Pi that feels like a comfortable everyday desktop: a quad-core Cortex-A76 at 2.4 GHz, PCIe for an NVMe SSD through the M.2 HAT+ (from $12), dual 4Kp60 HDMI, a real-time clock and a power button. It is the right brain when the deck needs:

- A smooth desktop and a real browser with several tabs open.
- SDR and signal work, where decoding radio in software wants CPU and RAM.
- Fast storage: an NVMe drive instead of a microSD card.
- Emulating newer consoles, local AI experiments or containers.
When not to
The Pi 5 has become expensive. Raspberry Pi raised prices in December 2025, February 2026, April 2026 and again on October 1, 2026, blaming memory costs, and calls the increases temporary. Current list prices are $45 (1GB), $77.50 (2GB), $110 (4GB), $175 (8GB) and $305 (16GB); the Pi 4 is $35, $67.50, $100 and $165 for 1, 2, 4 and 8GB. The full story is in our Raspberry Pi price increase guide. Skip the big Pi 5 when:
- The deck does one job. A messenger, synth or tool runs better on an ESP32 that is on instantly and lasts far longer on a battery.
- It is a text-first terminal. SSH, tmux and a text editor do not need 8GB. A Pi 5 with 1GB or 2GB ($45 or $77.50) gives you the speed without paying for memory, and a Zero 2 W does it on much less power when you can find one.
- Battery life matters more than speed. A Pi 5 idles at around 3 W before you add a screen.
The Compute Module 5 (from $67.50) is the Pi 5's brains on a small module with no ports of its own. It plugs into a carrier board, which is how many polished decks and ready-made kits work: the carrier puts the connectors exactly where the case needs them. The full comparison, including the Pico, Arduino and a mini PC, is in ESP32 vs Raspberry Pi: when you really need a Pi 5.
Screens and keyboards
The screen and the keyboard are the two biggest parts and the two you touch, so they set the size and shape of the whole deck. Buy them before you design anything.
| Screen | Resolution | Connection | Price |
|---|---|---|---|
| Raspberry Pi Touch Display 2, 5" | 720 x 1280 | DSI ribbon, powered from GPIO | $40 |
| Raspberry Pi Touch Display 2, 7" | 720 x 1280 | DSI ribbon, powered from GPIO | $60 |
| Raspberry Pi Touch Display 2, 10" | 1200 x 1920 | DSI, Pi 5 and Compute Modules only | $80 |
| Waveshare 7" HDMI LCD (C) | 1024 x 600 | HDMI, capacitive touch over USB | $43.99 |
| Waveshare 5" HDMI LCD | 800 x 480 | HDMI, resistive touch | $34.99 |
- DSI or HDMI? The official Touch Display 2 uses a flat DSI ribbon and takes its power from the GPIO header, so there is no bulky HDMI plug and no extra cable. It needs a Pi with a DSI connector; the Zero 2 W has none, so Zero decks use HDMI screens through its mini HDMI port.
- Portrait panels. The Touch Display 2 panels are natively portrait (720 x 1280). Raspberry Pi OS can rotate the picture for a landscape deck.
- Microcontroller screens are different: an ESP32 drives small SPI screens directly, which is why pocket decks have built-in displays rather than HDMI.
Keyboards. Compact 40% or 60% mechanical boards are the classic cyberdeck look; small wireless keyboards are the quickest route. A keyboard with a detachable cable makes the layout far easier, and a USB keyboard is one less thing to charge. For pocket decks, the keyboard is built in: the Cardputer ADV has 56 keys on a board smaller than a phone.
Power and battery life
Power is where most first builds struggle, especially with a Pi 5. The two usual choices are a USB-C PD power bank (simple, safe, charges like a phone) or a UPS board with 18650 cells (sits inside the case, keeps the Pi running while you swap to wall power).
- Know what the board wants. The Pi 5's official supply is 27 W (5V at 5A). On an ordinary 3A supply it limits USB peripherals to 600 mA in total, which catches out decks running a keyboard, an SSD and a radio from the Pi's own ports. Many power banks do not offer 5V at 5A, so plan for that limit or use a powered hub.
- An ESP32 deck is easy. It runs from a small lithium cell and can deep sleep on microamps. The Cardputer ADV has a 1750 mAh battery built in.
- Charge from outside. A panel-mount USB-C charging port means you never open the case to top it up.
How long will it run? The estimate
You can estimate battery life with one line of arithmetic: hours ≈ battery watt-hours ÷ deck watts. Battery watt-hours are the rated mAh times the cell voltage, divided by 1,000.
- Battery: a 10,000 mAh power bank at 3.7V nominal holds about 10,000 × 3.7 ÷ 1,000 = 37 Wh.
- Deck: a Pi 5 sitting near idle draws about 3 W, and a small screen adds a few watts more. Call it around 6 W for the sake of the sum.
- Divide: 37 ÷ 6 ≈ 6 hours on paper.
- Subtract losses: converting the 3.7V cells up to 5V wastes some energy, and batteries rarely deliver every rated milliamp-hour. Plan on noticeably less, very roughly 4 to 5 hours of light use. Under heavy load (7 to 9 W for the Pi alone) expect a lot less.
This is an estimate, not a measurement. Your screen, brightness, WiFi, radios and workload all change the number. Measure your own deck with a USB power meter and redo the sum with the real watts.
I/O and modules on the GPIO header
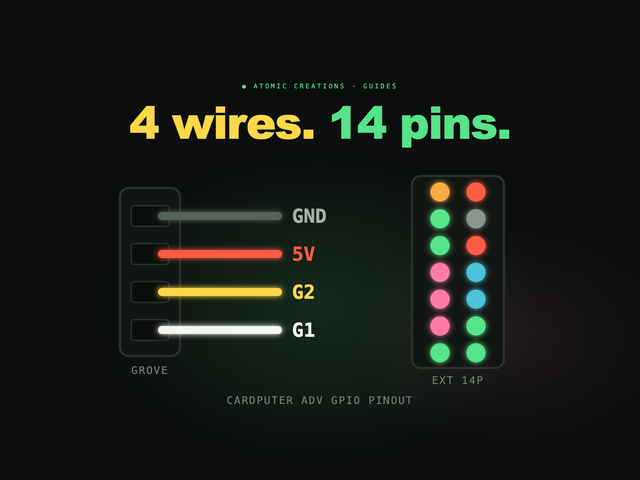
The 40-pin header is what turns a small computer into a cyberdeck. It carries power pins, plain GPIO pins for switches and LEDs, and three buses that almost every module uses: I2C (lots of simple devices on two wires), SPI (fast: screens and radios) and UART (serial text, like GPS). Pick a module, check its bus, and you know which pins it goes to.
| Module | What it adds | Connects over |
|---|---|---|
| SX1262 LoRa radio | Long-range, off-grid text with Meshtastic | SPI |
| NEO-6M GPS | Location and accurate time | UART |
| BME280 | Temperature, humidity, pressure | I2C |
| SSD1306 OLED | A small status screen on the case | I2C |
| SDR dongle | Listen to the radio spectrum | USB |
| USB hub | More ports for keyboard, storage, dongles | USB |
| Toggle switches and LEDs | Physical controls and status lights | Plain GPIO |
Two rules. Raspberry Pi GPIO pins are 3.3V and not 5V tolerant, so a 5V signal wired straight in can damage the board. And a single pin can safely supply only around 16 mA: fine for an LED with a resistor, not for a motor or relay coil, which need a driver. Never power a LoRa radio without its antenna attached.
The full pinout, which pins carry I2C, SPI and UART, and what changed on the Pi 5 (old RPi.GPIO code needs gpiozero or rpi-lgpio) are in our Raspberry Pi GPIO pinout guide.
The shell: five ways to build the case
| Case type | Skill | Best for | Watch out for |
|---|---|---|---|
| Rugged hard case | Beginner | A tough field deck, fast | Sealed boxes trap heat |
| 3D printed shell | Intermediate | Exact fit, handhelds, custom shapes | Design time; PLA softens around 60°C |
| Laser-cut panels | Beginner to intermediate | Clean faceplates, boxy desk decks | Flat parts only; never cut PVC |
| Found object | Intermediate | Character: ammo cans, radios, briefcases | Metal blocks radio; one shot at each cut |
| Hybrid | Intermediate to advanced | The builds that win contests | More methods, more time |
Whatever the shell, the same details decide whether it works: design around the screen and keyboard first, mount the board on M2.5 standoffs (with heat-set inserts in printed cases), put the heavy battery low, use panel-mount USB-C and antenna jacks, and mock it up in cardboard before you cut anything. PETG is the sensible default filament for a finished printed deck. Our cyberdeck case ideas guide covers each case type, filaments, Pi 5 mounting dimensions and where to find STL files. For the look (colors, labels, wear), the cyberpunk room decor guide has palettes that work on a deck too.
Thermal basics
- The Pi 5 needs a fan. Raspberry Pi recommends active cooling, and the chip throttles back at around 80 to 85°C.
- A cooler only moves heat into the case. In a closed box that air just gets hotter. Give it an intake low down and an exhaust high up, with the fan's path clear.
- Keep hot parts off plastic. PLA starts to soften around 60°C, well below what the Pi's chip is allowed to reach. Use PETG or ASA near heat, and never leave a PLA deck in a hot car.
- Mind the battery. Lithium cells do not like heat. Keep them away from the board and the exhaust.
- Microcontroller decks run cool. An ESP32 deck rarely needs any cooling at all, which is one more reason pocket decks are so simple to build.
Cyberdeck build list: three builds with prices
Three tiers, from a pocket deck to a full field computer. Prices are official list prices checked October 2026; "varies" means the part comes in many versions at very different prices, so check what you pick.
1. Pocket ESP32 deck
| Part | Choice | Price |
|---|---|---|
| Brain, screen, keyboard, battery | M5Stack Cardputer ADV (ESP32-S3, 56 keys, built-in screen, 1750 mAh battery) | $29.90 |
| Radio (optional) | Cardputer Mesh Kit: the ADV plus a LoRa and GPS cap, Meshtastic preinstalled | $48 instead |
| Storage | microSD card | Varies |
| Total | About $30 to $48, plus a card |
No case to design, no power to solve: the deck is done, and the fun is in the firmware. Our guide to Cardputer ADV firmware and apps covers what it can run.
2. Budget Linux deck
| Part | Choice | Price |
|---|---|---|
| Brain | Pi Zero 2 W if you can find one, or a Pi 5 2GB | $15 or $77.50 |
| Screen | Waveshare 5" HDMI, 800 x 480 | $34.99 |
| Keyboard | Small USB or wireless keyboard | Varies |
| Power | USB-C power bank | Varies |
| Storage and cables | microSD card, HDMI adapter (mini HDMI on the Zero, micro HDMI on the Pi 5) | Varies |
| Case | 3D printed shell or a small found box | Varies |
| Known parts | About $50 (Zero) or $112 (Pi 5), plus the rest |
3. Full Raspberry Pi 5 field deck
| Part | Choice | Price |
|---|---|---|
| Brain | Pi 5, 8GB (or 4GB to save money) | $175 ($110) |
| Cooling | Active cooler with fan | Varies |
| Screen | Raspberry Pi Touch Display 2, 7" (or Waveshare 7" HDMI (C)) | $60 ($43.99) |
| Storage | M.2 HAT+ plus an NVMe SSD | From $12, plus the drive |
| Power | UPS board with 18650 cells, or a USB-C PD bank | Varies |
| Radio and sensors | SX1262 LoRa, NEO-6M GPS, BME280, SDR dongle | Varies |
| Keyboard | Compact 40% or 60% mechanical | Varies |
| Case | Rugged hard case with a cut or printed faceplate | Varies |
| Known parts | About $247 (8GB) or $182 (4GB), before the "varies" parts |
Building around a Compute Module 5 instead? It starts at $67.50, but you also need a carrier board, and the carrier decides the rest of the parts list.
Cyberdeck kits and decks for sale
There is no single standard "cyberdeck kit", but a few products get you most of the way without designing a case:

ClockworkPi uConsole
KitA kit with a 5" 720p IPS screen, a backlit QWERTY keyboard and a battery module, built around a Raspberry Pi CM4 (and compatible modules). You assemble it, then customize the software. See ClockworkPi's uConsole page for current pricing.
M5Stack CardputerZero
Pocket LinuxA handheld Linux computer on a Raspberry Pi CM0, with a keyboard, screen and battery. $149 MSRP, or $99 for the Lite, with shipping expected around November 2026. Compared in detail in Cardputer ADV vs CardputerZero.
M5Stack Cardputer ADV
Pocket ESP32$29.90 for an ESP32-S3 with a 56-key keyboard, screen and 1750 mAh battery. The smallest, cheapest finished deck you can buy, and a good way to find out what you would want in a bigger build.
A kit is the right choice if you want to use a deck more than build one. Building from parts is the right choice if the build is the point.
Software
- Raspberry Pi OS is the default for Pi decks. The Lite version (no desktop) boots to a terminal and saves power and memory on a text-first deck; the full version gives you a desktop and browser.
- SSH lets you set the deck up from another computer before the keyboard and screen are even mounted, and lets the deck reach your servers from anywhere.
- tmux and terminal apps (editors, file managers, system monitors, chat and mail clients) make a small screen feel much bigger: split panes beat overlapping windows at 5 inches.
- GPIO code: the gpiozero Python library drives switches, LEDs and many modules, including on the Pi 5.
- ESP32 decks run one firmware at a time: you flash an app (Meshtastic, a synth, a tool) and swap when you want something else.
Cyberdeck build guide, step by step
- Write down the job. One sentence. It decides whether you need an ESP32, a Zero 2 W, a Pi 5 or a Compute Module.
- Buy the screen and keyboard. Measure them for real, including cables and connectors. They set the size of everything.
- Bench-test the electronics. Brain, screen, keyboard and every module wired up on a table, running the software you actually plan to use.
- Measure the power. Put a USB power meter inline, read the real watts, and size the battery with the watt-hour sum above.
- Choose and plan the case. Lay everything out at 1:1 on paper, plan airflow and where the ports and antennas exit, then mock it up in cardboard.
- Build the shell. Print, cut or modify it, with standoffs for the board and brackets (not glue) for the battery.
- Install and wire. Panel-mount ports, route cables with slack through any hinge, antennas outside, fan path clear.
- Run it hot. Load it for an hour with the lid closed and check temperatures before you trust it in a bag.
- Iterate. Your first deck will teach you what you want in your second. Almost every builder makes more than one.
Coming soon: our own builds. We are building our own cyberdecks, and we will publish the build logs here: photos, the behind-the-scenes mistakes, and the 3D design process from first sketch to finished shell.
The music deck in your pocket
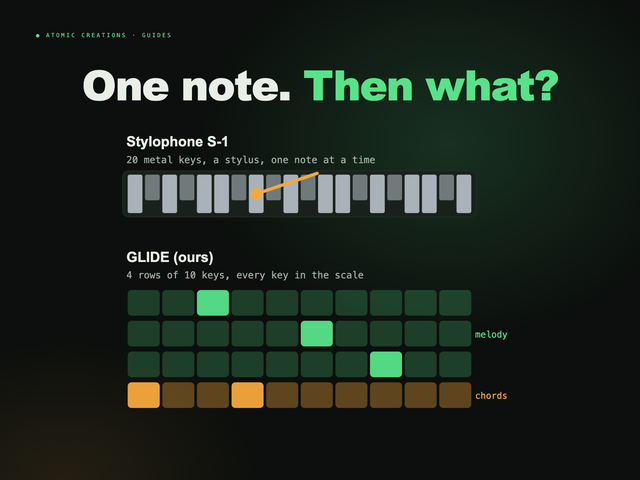
Full disclosure: this one is ours. We make GLIDE, a synthesizer that turns a Cardputer ADV into a pocket music deck, so in a way we build tiny cyberdecks for a living. It is a microcontroller job for exactly the reasons above: it plays the instant you switch it on, every note lands on time, and it runs on the built-in battery. The keyboard becomes four rows tuned like strings, notes slide into each other, and it can listen to a song and retune itself to its key. You can play it right below, in your browser.
Useful? Pass it on
← Browse all guides